

Reconciliation End User Reference Guide
This document is intended to serve as a reference guide to assist with the most commonly used
functions of the American Express @ Work1 reconciliation end user module.
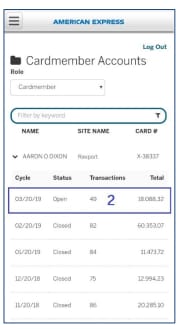
VIEWING TRANSACTIONS FOR A BILLING CYCLE

1. Log in at https://reconciliation.americanexpress.com
- The first screen will show your Accounts Summary.
- If you have more than one Card Account enrolled for @ Work Reconciliation, they will show as a list.
- Initially, only the most recent Billing Cycle will show for each Card. You can click on the left half of the line to expand this view to show up to the last thirteen Billing Cycles.
- If you have multiple roles, you can use the Role dropdown to toggle between the role.

2. Next, click on the desired Billing Cycle on the right to go to the Transaction List View for that cycle
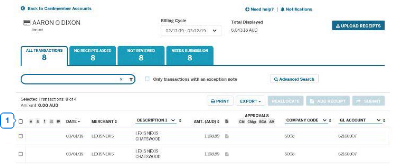
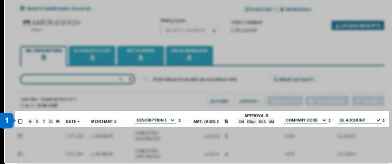
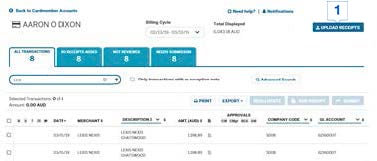
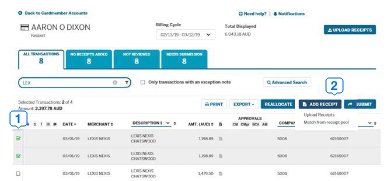
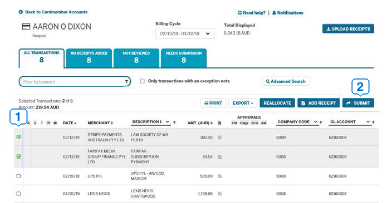
TRANSACTION LIST VIEW DETAILS


The Tabs act as filters for the transactions and will be displayed depending on your role and on your business rule choices determined by your company.


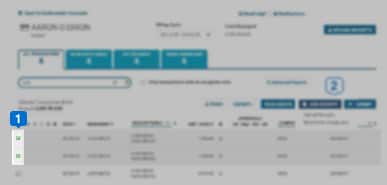
The leftmost column of checkboxes is for Transaction Selection. Your company may permit you to select more than one transaction or all transactions on the screen. Your company may permit you to make mass changes for approvals, receipts or reallocations.


Columns are sortable, and the arrow icon will indicate if they are sorted ascending or descending


For Corporate Purchasing Card (CPC), Corporate Meeting Card (CMC) and vPayment products, there is a selectable column you can use to select which transaction data elements to display. The keyword filter will search whichever data field you have selected in addition to the fixed columns.


There are two selectable columns displaying the accounting codes for the first accounting allocation line for a transaction. The Keyword Filter will also search these columns. You can change which accounting codes to show on-the-fly.
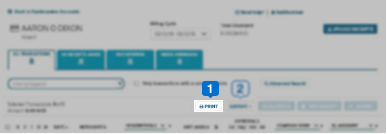
Other functions on the Transaction Summary page include:
- Print to print the summary of the transactions for the selected cycle
- Export to export the transactions in CSV format based on the data fields you choose
- Advanced Search if you are looking to find transactions, and the Keyword Search is not sufficient.
SEARCHING FOR A TRANSACTION
@ Work Reconciliation allows users to create Transaction Searches and save them for future use
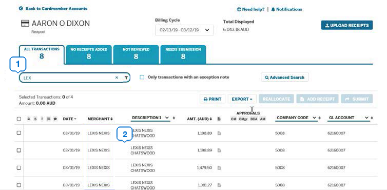
Begin by typing a word or a number into the Keyword Filter area.
The Transaction list will filter as you type the Date, Merchant Name, Amount or an Accounting Value that is shown on the screen.
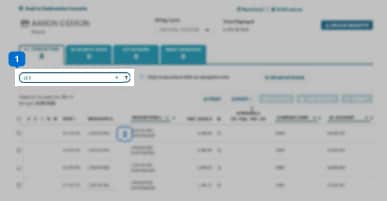
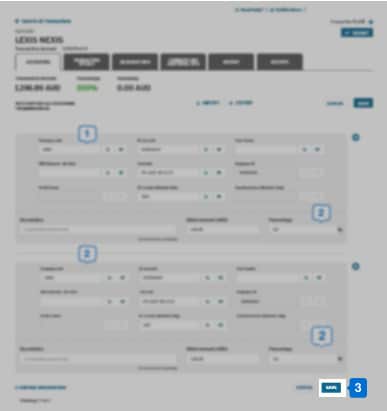
CHANGING THE ACCOUNTING FOR A TRANSACTION
Select the desired Transaction by clicking on its row. This will take you to the Accounting Tab in the Transaction Detail screen
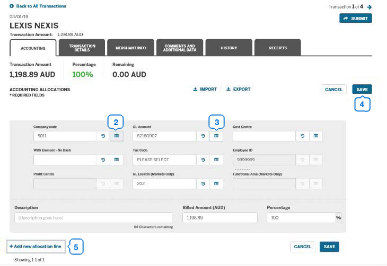
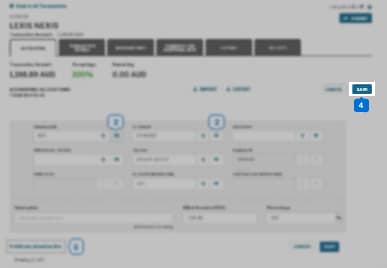
Click in the Accounting Field you wish to change. You can type the code in manually or a dropdown list with up to 100 valid values is available. To narrow down the dropdown choices, you can start to type either the accounting code, value or partial description.
Some companies have accounting codes that are validated in combination with other codes. In this case, @ Work Reconciliation will indicate which fields are linked with the accounting field you are entering.
When you are finished reallocating, press the Save button.
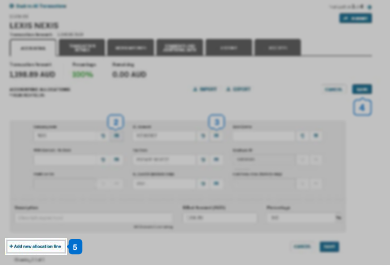
If you would like to split a transaction over two or more codes, click on ‘+ Add New Allocation Line’. You will not be able to Save until the allocation amounts balance to %100 of the transaction amount.
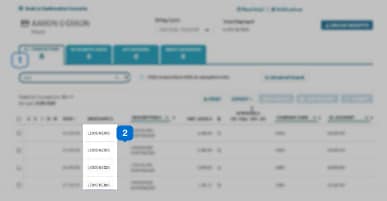
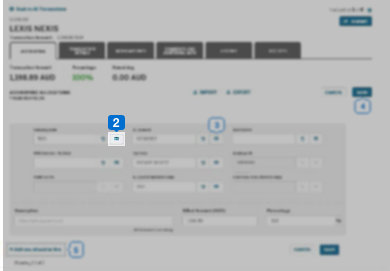
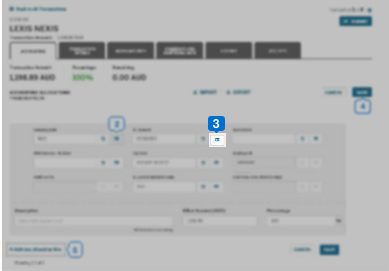
SPLITTING ACCOUNTING FOR A TRANSACTION
@ Work Reconciliation allows you to split a transaction into multiple accounting allocation lines
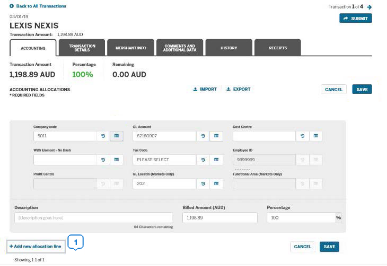
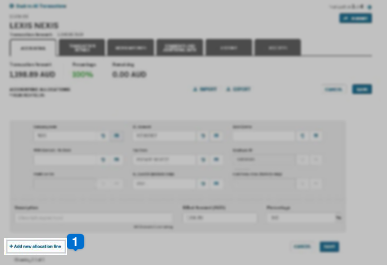
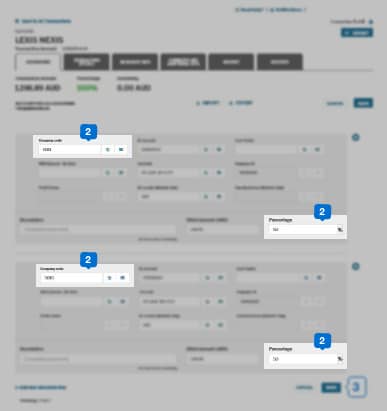
Select the desired Transaction and click on the +Add new allocation line link on the Accounting Tab.

You can split the allocation by amount or a percentage. The totals of the splits must equal 100% of the transaction amount or you will not be able to save the reallocation.
You can split any Accounting Field and you can add as many allocation lines as needed. When you are finished reallocating, click the Save button.
UPLOADING RECEIPTS TO THE RECEIPTS POOL
The Receipt Pool allows users to upload receipts to the system in advance so they can be attached at a later time.
Your company will determine if receipts should be attached at the Billing Cycle Level or at the Transaction Level. If the button says, “Upload Receipts," then your company uses Transaction Level receipts. If it says Receipt Pool, your company uses Billing Cycle Level receipts.
1. To upload a receipt to the Receipt Pool, click the button and select the receipt to be stored.
Note: If there is no button at all, then either your company is not configured for attaching receipts or your company Administrator may have
locked the cycle so no more receipts can be added. Check with your Administrator to verify how long after the cycle close date receipts can still
be attached.
UPLOADING RECEIPTS FROM A PHONE
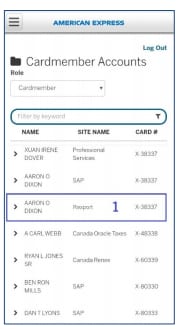
1.Select the Card Account.
2. Tap on the correct Billing Cycle for the receipt.
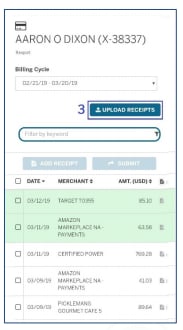
3. Press the Upload Receipts button. If your company uses Billing Cycle level receipts, this button will say Receipt Pool.
Note: If your company uses Transaction Level Receipts, you will need to use a computer or tablet to match the receipts from the Receipt
Pool to the transactions.
MATCHING RECEIPTS TO A TRANSACTION
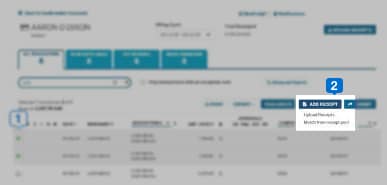
Select the desired transaction(s) by placing a checkmark in the box(es).
Note: You can attach a single receipt to multiple transactions if needed.
Click on the “Add Receipt” button. You have two options:


- Click on “Upload Receipts” to upload the desired receipt from your computer
- Click on “Match from Receipt Pool” to select the receipt from the pool
SUBMITTING TRANSACTIONS FOR APPROVAL
Your company may require you to submit transactions for approval. This will be indicated by the presence of the "Submit" button. If your company does not require approval, this button will say “Review.
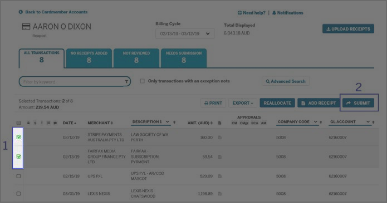

Select the desired transaction(s) by placing a checkmark in the box(es).
- Most companies allow users to select multiple transactions for approval. (You also can click the top checkbox to select all transactions on the page you are viewing,)
- If your company does not allow this, the Submit button will be greyed out if you select more than one transaction.
Select the Submit button above the Transaction Headings to submit the transactions for Manager Approval.
EXPORT AND PRINT FUNCTIONS
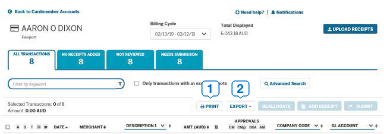
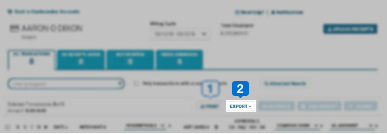
Click the Print button to print a PDF summary page, as well as a list of your transactions and accounting information.
The Export option allows you to customize what you will see in the printout. Click the Export button and select the fields to be included.

- You can change the order and save the export as well. The export is provided in a csv file that can be easily pulled into a spreadsheet for manipulation.
Terms & Conditions
1Use of American Express @ Work ® is restricted to employees, contractors and/or agents that the Company, and its representatives designate for the sole purpose of performing online account queries and maintenance, including accessing and/or creating reports relating to the Company's American Express® Corporate Card programs. @ Work is available to all companies with an American Express Corporate Card program.
Enrollment is required. To enroll in @ Work please contact your American Express Representative or call 1-888-800-8564.
Recommended Articles
Reconciliation
Learn about the features offered by @ Work Reconciliation that help you simplify your accounting. This article explains how our automated tools assist in taking out all the hard work from the reconciliation process.
Reports
Learn how to navigate and make optimal use of the @ Work Reporting tool. Master the skills of viewing, building, and customizing reports to get a comprehensive picture of your spending.